Important disclaimer as always: For entertainment purposes only, and if you consider doing this, only do so if you’re a medical professional.
I recently was investigating bloodletting – you know, the historic “therapy” in ancient medicine which was supposedly the standard therapy for pretty much any ailment due to the lack of other options. I might be simplifying here, but you get the point.
The procedure was simple: Doctors would draw out, say, 500ml of blood (hopefully not more?), then clap their hands and say “done!”, as that was all that needed to be done.
On more serious terms, there might indeed be some health benefits. Approaching this topic is rather simple, as you simply have to replace the word “bloodletting” with “regular blood donations” in your brain, and suddenly it sounds like you’re doing serious science, similar to what I’m telling myself I’m doing here. Consider this study on firefighters (??) which showed that regular blood donations decreased the level of “forever chemicals” (e.g. PFAS) in their blood. This, of course, makes intuitive sense because, well, if PFAS are in your blood, and you take blood out, you’re going to be left with less PFAS (and, less blood, temporarily).
The much bigger question, of course, is whether having PFAS in your blood is bad at all, and if so, which negative health effects they have.
I don’t have an answer to this question. And likewise, I don’t have a rational answer to the question why the hell I wanted to try out bloodletting.
So let me prefix this self-experiment with the fact that I don’t have any evidence to expect positive health benefits except the warm feeling that a bunch of firefighters in Australia did some regular blood donations and reduced their PFAS levels.
So that’s what I wanted to do, too.
The problem, however, was that not everyone can donate blood – and given that I have an autoimmune disease, I wouldn’t qualify as a donor.
But that’s not a problem, because I’m a doctor, and drawing out 500ml of blood is something I can easily do in the comfort of my own home, right?
And in the process, as always, I can go deep down into the rabbit hole and over-engineer the hell out of it. So here we go.
Typical Blood Donations
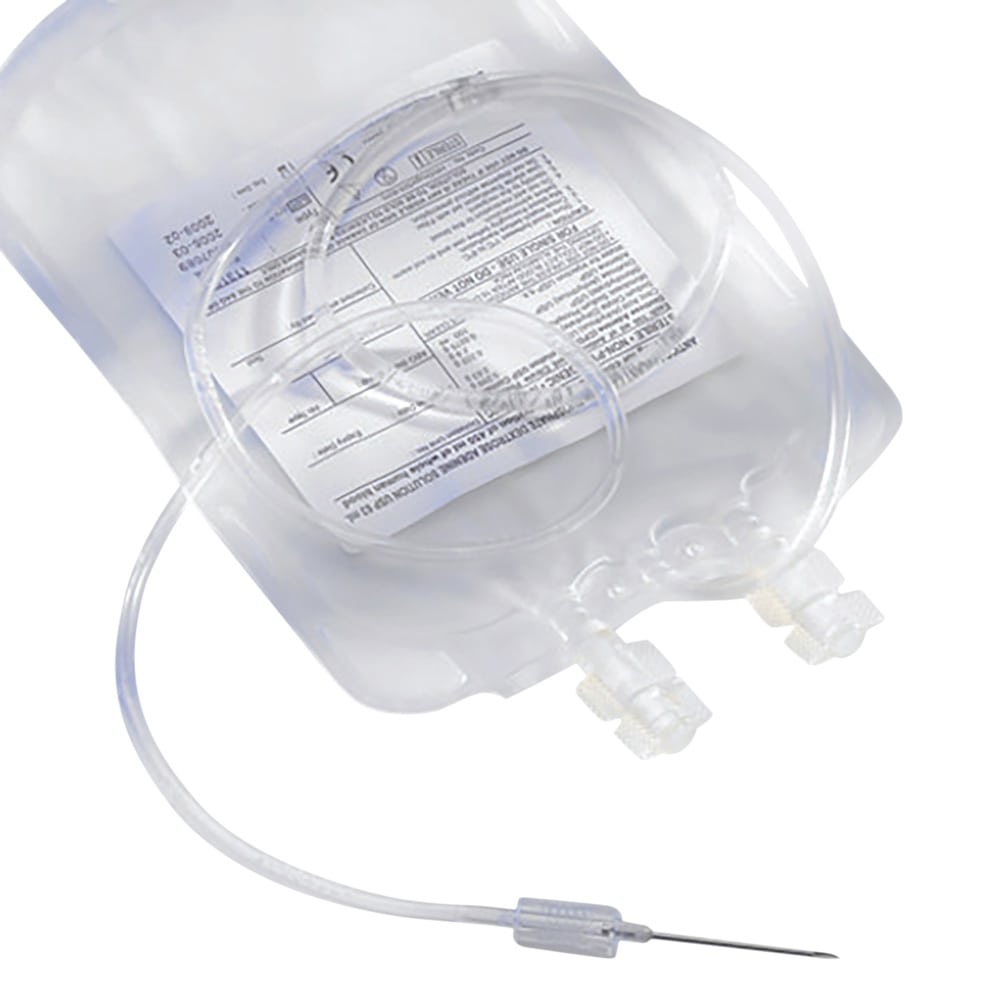
Normally, this is how blood donations work: There’s a “blood bag” (picture below) which is simply an empty plastic bag which has a tube connected which itself is connected to a needle, and that needle is inserted into a vein in your arm. Then, the bag is lowered and blood flows because of.. gravity. This is generally a good and very simple setup as you don’t need any additional equipment.
The biggest drawback for my purpose, however, is that the needle is huge. Its diameter is 16G (Gauge: lower values = larger diameter) which is freakin’ gigantic if you’re simply in this business for recreational self-experimental purposes like I was. Also consider my handicap of having to do this whole procedure one-handed because I obviously can’t use my arm into which I’m inserting the needle.
So I concluded that this option was not viable for now (and of course I realized that only after ordering a bunch of blood bags, as any sort of medical equipment seemingly can only be ordered in bulk. sigh. well, at least now I have a bunch of blood bag lying around).

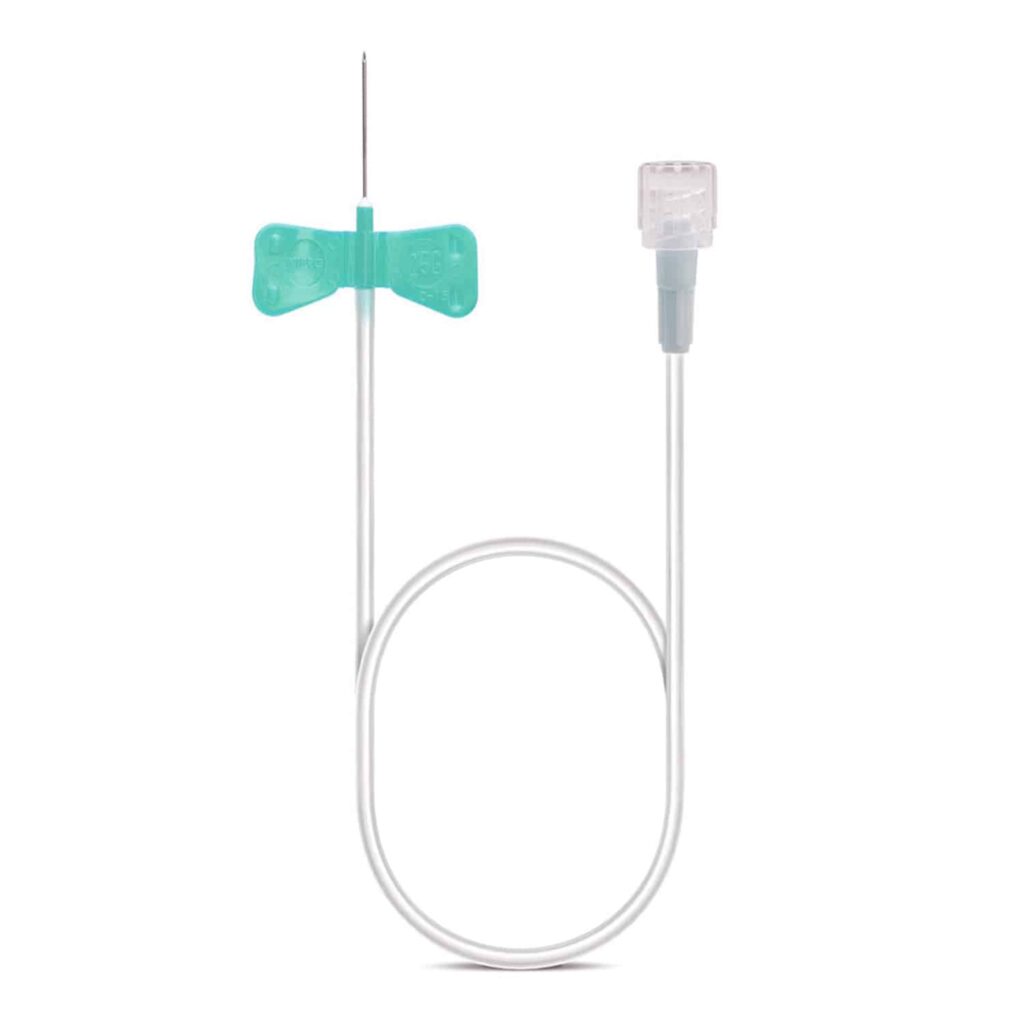
Which other options do we have? Well, simple – just use a smaller needle. But this is where it gets tricky: If you just use a “normal” butterfly needle which normal physicians use for normal blood lab tests (21G needle, by the way – much smaller), you run into what you could call a “tooling problem” – how do you connect the adapter of the butterfly (see below) to the damn blood bag?

It took me a few evenings to figure this out, so here’s my solution.
TLDR: Throw away the blood bag. Then proceed to connect the butterfly adapter to a 30cm extension tube, connect the extension tube to a BD vacutainer adapter and (later) connect the vacutainer adapter to a 500ml vacuum bottle (!).
An Optimized Bloodleeting Setup Based On a Butterfly Needle And Vacuum Bottle
So here’s the thing: At first I thought it’s enough to insert the butterfly needle into my vein, connect the tube to an extension, lower that extension to my living room floor and “aim” it into a bottle. Kind of replicating the blood bag, without the blood bag, but with the same gravity, and a bottle. This, however, didn’t work properly because the needle diameter was too small – the blood was only dripping into the bottle. There’s also this side story of the tube slipping out of the bottle and me creating a “crime scene” on my living room floor, but that’s a story for another day. The fact is, it was dripping too slowly. I tried a ton of “optimizations” (standing, pumping my first, etc.), but to no avail.
Stronger suction was needed.
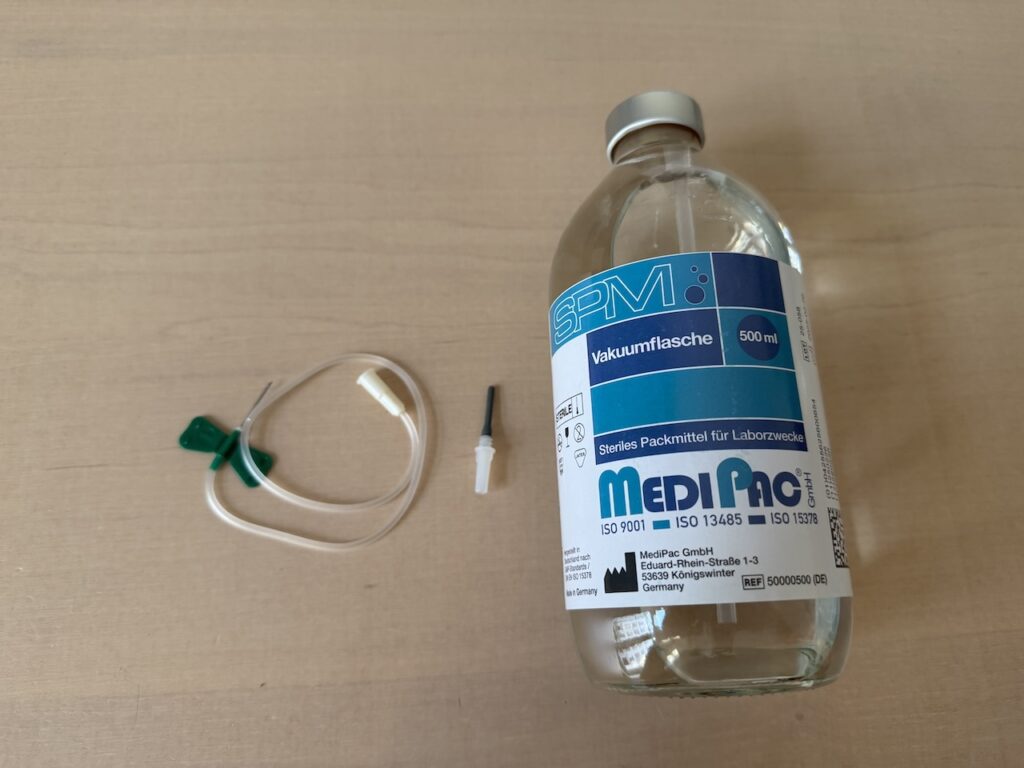
So I purchased a 500ml vacuum bottle (picture below) which I would connect to the extension which I would connect to the butterfly. But now the next problem was that I needed another needle to insert into the vacuum bottle (which has a fancy membrane-rubber-thing at the top into which you insert the needle, because otherwise the vacuum simply disappears with a “pop”, obviously).
This was super hard to figure out, but the answer is that you can purchase these innocent-looking “BC Vacutainer” adapters which are actually made for a very different purpose, but they fit and have a needle which is hidden in a grey rubber coating (dangerous?) on the other end. Perfect for our purpose.
So here’s the optimized setup (the extension tube in between is missing, but you’ll figure that out):

And this is how it works:
- Connect the butterfly with the extension tube (not shown).
- Connect the end of the extension tube with the grey BD vacutainer adapter (small thing with grey tip – caution, it’s a needle).
- Insert butterfly needle into vein (only do this if you’re a medical professional, obviously – disinfect, use a tourniquet, etc.).
- Release tourniquet.
- Fix needle in vein by sticking plaster over the tube close to the insertion area (this is a one-handed operation, remember? so you don’t want to dislodge the needle while you’re fumbling with the vacuum bottle).
- Cautiously insert grey BD adapter needle into vacuum bottle.
- Observe how blood flows.
Success. I was able to draw out ~500ml, the full volume of the bottle, in 10-15 minutes or so.
I think this was cool. I learned a lot about medical equipment in addition to my hospital training of ~1.5 years. And the bigger lesson here is that you indeed can do bloodletting with smaller-diameter needles than the huge 16G ones for blood donations. One important side note here is that this setup is not viable for actual blood donations where you want to use the blood for some constructive purpose afterwards as 1) the vacuum and 2) the small needle will lead to hemolysis to some degree. They’re using the big needle and plastic bag for a reason.
Still, I thought this was cool, because it’s an “optimized hobbyist’s setup for bloodletting”. At the very least, it minimizes tissue damage by using a smaller needle, and it’s slightly more ergonomic to self-administer in a one-handed operation which would mean that it possibly be viable e.g. for hemochromatosis patients to do this at home. Pretty cool.
As a further thought, I don’t think you can go much smaller than 21G for the needle as my setup already took slightly more than 10 minutes for the 500ml.
Now, the next challenge is.. what to do with the damn bottle as it’s sealed shut and 500ml of my blood is vacuum-trapped in it. Well. I suppose tomorrow-Oliver will have to deal with that.
Leave a Reply